


1.完整项目描述和程序获取
>面包多安全交易平台:https://mbd.pub/o/bread/Y5mamppp
>如果链接失效,可以直接打开本站店铺搜索相关店铺:
>如果链接失效,程序调试报错或者项目合作也可以加微信或者QQ联系。
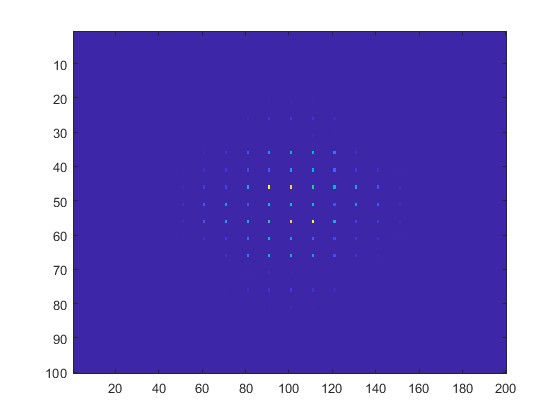
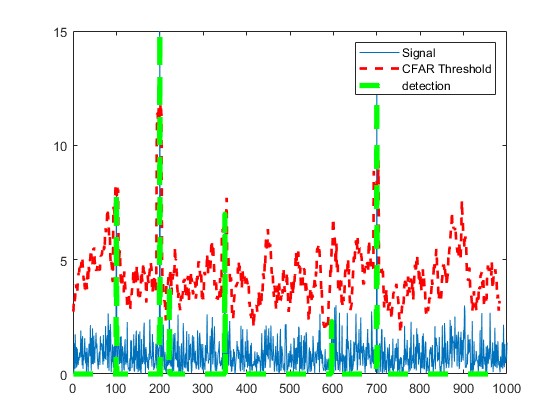
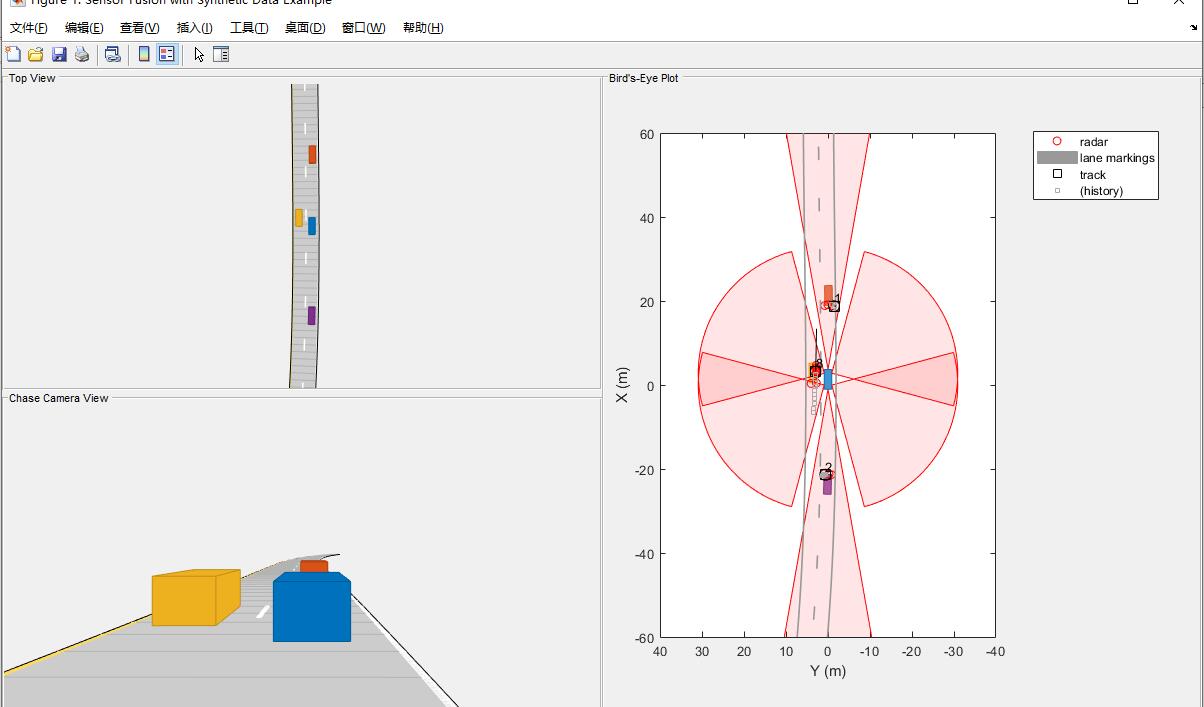
2.部分仿真图预览

3.算法概述
扩展卡尔曼滤波的初始化,需要将各个变量进行设置,对于不同的运动模型,状态向量是不一样的。为了保证代码对不同状态向量的兼容性,我们使用Eigen库中非定长的数据结构。初始化扩展卡尔曼滤波器时需要输入一个初始的状态量x_in,用以表示障碍物最初的位置和速度信息,一般直接使用第一次的测量结果。这两个公式求的是卡尔曼滤波器中一个很重要的量――卡尔曼增益K(Kalman Gain),用人话讲就是求差值y的权值。第一个公式中的R是测量噪声矩阵(measurement covariance matrix),这个表示的是测量值与真值之间的差值。一般情况下,传感器的厂家会提供。
扩展卡尔曼(EKF)与经典卡尔曼(KF)的区别在于测量矩阵H的计算。EKF对非线性函数进行泰勒展开后,进行一阶线性化的截断,忽略了其余高阶项,进而完成非线性函数的近似线性化。正是由于忽略了部分高阶项,使得EKF的状态估计会损失一些精度。
卡尔曼滤波作为连续状态空间问题的一种解决方案,已经成功运用在火星登陆和自动导弹制导等领域。本质上卡尔曼滤波(Kalman Filter)是一置信度为正态分布的贝叶斯(Bayes Filter)滤波器,它的置信度可以表示为一个均值向量和协方差矩阵的形式,均值向量表示可能的状态,协方差矩阵表示该状态的不确定度。
4.部分源码
%测试传感器融合跟踪
%在自我载具左侧经过的载具。场景
%模拟公路设置,其他车辆位于和前面
%在自我汽车后面。
scenario = drivingScenario;
scenario.SampleTime = 0.01;
% Rear-left-facing short-range radar sensor at the left rear wheel well of the car.
sensors{3} = radarDetectionGenerator('SensorIndex', 3, 'Height', 0.2, 'Yaw', 120, ...
'SensorLocation', [0, egoCar.Width/2], 'MaxRange', 30, 'ReferenceRange', 50, ...
'FieldOfView', [90, 5], 'AzimuthResolution', 10, 'RangeResolution', 1.25);
% Rear-right-facing short-range radar sensor at the right rear wheel well of the car.
sensors{4} = radarDetectionGenerator('SensorIndex', 4, 'Height', 0.2, 'Yaw', -120, ...
'SensorLocation', [0, -egoCar.Width/2], 'MaxRange', 30, 'ReferenceRange', 50, ...
'FieldOfView', [90, 5], 'AzimuthResolution', 10, 'RangeResolution', 1.25);
% Front-left-facing short-range radar sensor at the left front wheel well of the car.
sensors{5} = radarDetectionGenerator('SensorIndex', 5, 'Height', 0.2, 'Yaw', 60, ...
'SensorLocation', [egoCar.Wheelbase, egoCar.Width/2], 'MaxRange', 30, ...
'ReferenceRange', 50, 'FieldOfView', [90, 5], 'AzimuthResolution', 10, ...
'RangeResolution', 1.25);
% Front-right-facing short-range radar sensor at the right front wheel well of the car.
sensors{6} = radarDetectionGenerator('SensorIndex', 6, 'Height', 0.2, 'Yaw', -60, ...
'SensorLocation', [egoCar.Wheelbase, -egoCar.Width/2], 'MaxRange', 30, ...
'ReferenceRange', 50, 'FieldOfView', [90, 5], 'AzimuthResolution', 10, ...
'RangeResolution', 1.25);
%需要跟踪高度。
tracker = multiObjectTracker('FilterInitializationFcn', @initSimDemoFilter, ...
'AssignmentThreshold', 30, 'ConfirmationParameters', [4 5], 'NumCoastingUpdates', 5);
positionSelector = [1 0 0 0; 0 0 1 0]; % Position selector
velocitySelector = [0 1 0 0; 0 0 0 1]; % Velocity selector
BEP = createDemoDisplay(egoCar, sensors);
toSnap = true;
while advance(scenario) && ishghandle(BEP.Parent)
% Get the scenario time
time = scenario.SimulationTime;
% Get the position of the other vehicle in ego vehicle coordinates
ta = targetPoses(egoCar);
% Simulate the sensors
detections = {};
isValidTime = false(1,6);
for i = 1:6
[sensorDets,numValidDets,isValidTime(i)] = sensors{i}(ta, time);
if numValidDets
detections = [detections; sensorDets]; %#ok<AGROW>
end
end
% Update the tracker if there are new detections
if any(isValidTime)
vehicleLength = sensors{1}.ActorProfiles.Length;
detectionClusters = clusterDetections(detections, vehicleLength);
confirmedTracks = updateTracks(tracker, detectionClusters, time);
% Update bird's-eye plot
updateBEP(BEP, egoCar, detections, confirmedTracks, positionSelector, velocitySelector);
end
% Snap a figure for the document when the car passes the ego vehicle
if ta(1).Position(1) > 0 && toSnap
toSnap = false;
snapnow
end
end
A111